
Settings
Use Settings to manage your personal preferences and your active persona. You open it from the user menu in the top right.
Which options you see inside a category depends on your role, your persona, and what your organization has enabled. For example, you only see the organization instruction if you have the Owner role.
How the page is built
Section titled “How the page is built”Settings uses click navigation instead of one long scrolling page. A list of categories sits on the left; you click one and only that category is shown. On a phone the same list becomes a row of buttons above the content that you can swipe sideways.
The eight categories, in order:
- Personal information
- Instructions
- Persona
- Language
- Chat
- Personal knowledge base
- Memory
- Notifications
Links to a category open the right place directly. For example, My Files in the user menu takes you straight to Personal knowledge base, and the Manage notification preferences button on the notifications page takes you to Notifications.
Personal information
Section titled “Personal information”You see your first name, last name, email address, organization, and role here. Those details come from your account; you do not change them here.
What you do fill in is your BIO: a short description of yourself or your practice. The assistant reads it as background to your questions. Click Save to store it, or Reset to undo your change.
The persistent instructions for the assistant do not live here, but in the Instructions category.
Instructions
Section titled “Instructions”This is where you set how the assistant behaves.
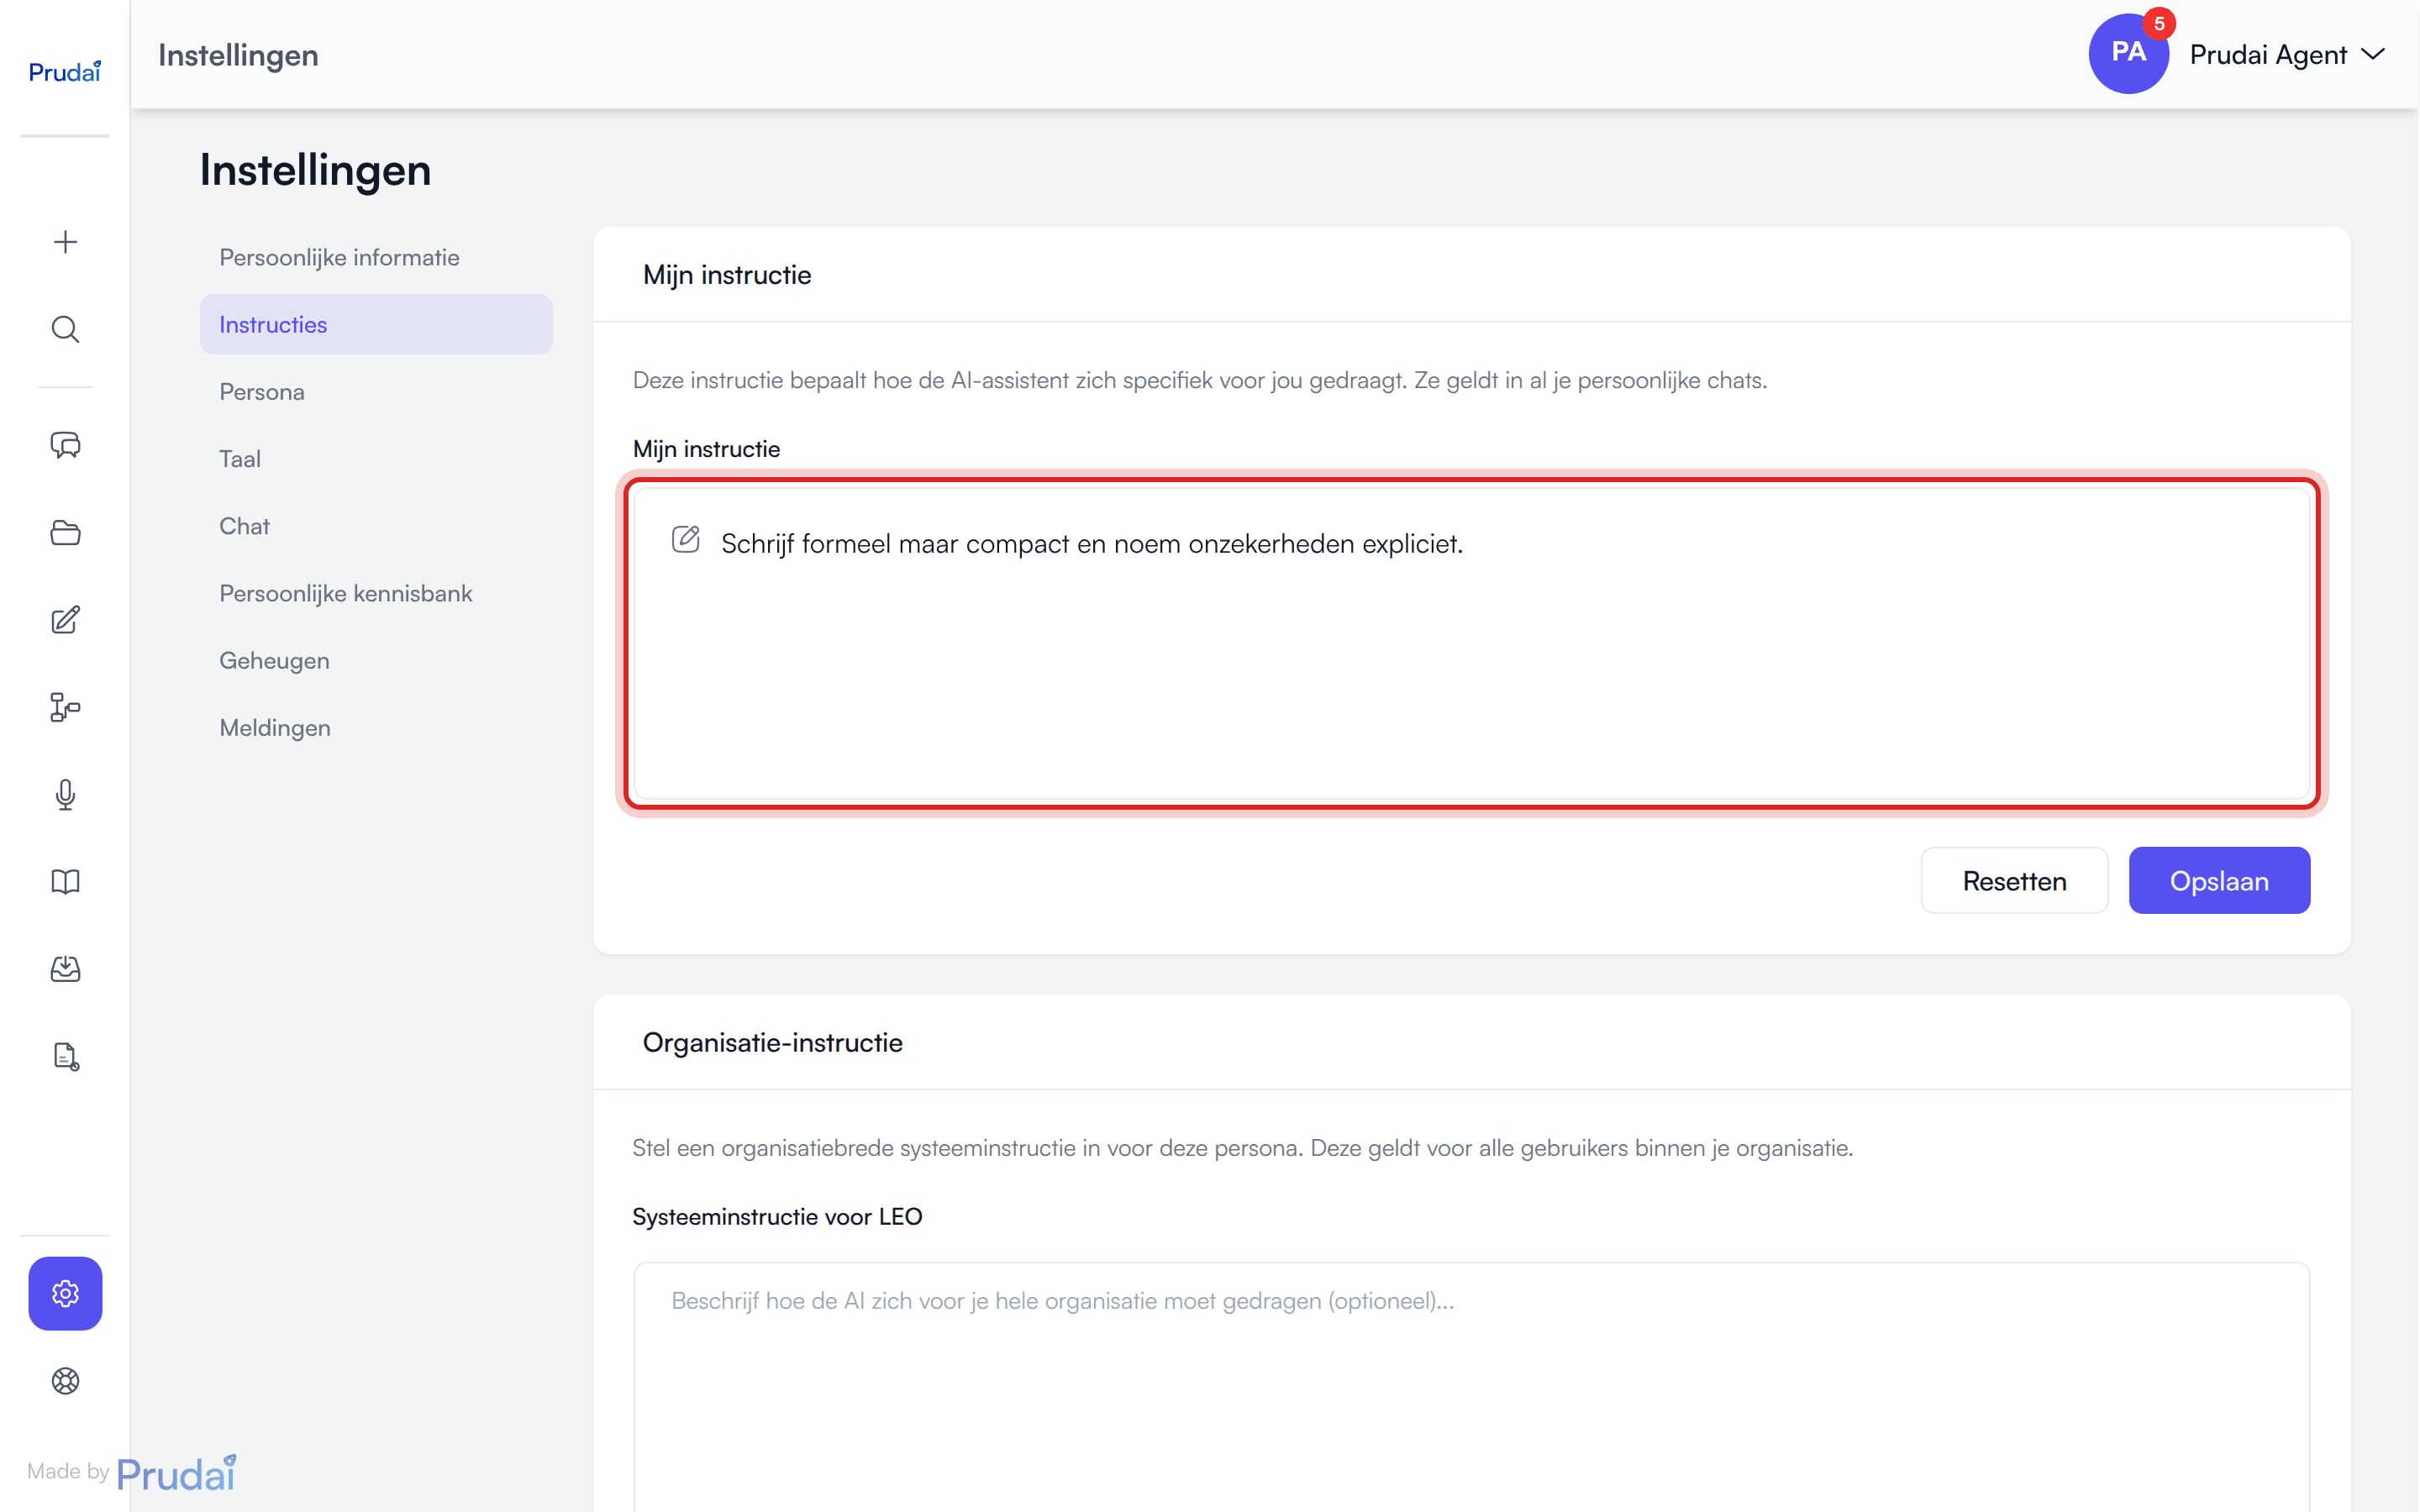
My instruction. Your personal instruction applies in all your personal chats. Use it for stable working rules, for example:
- “Always use a table for risks.”
- “List uncertainties explicitly.”
- “Write in English, formal but compact.”
Do you always write advice in three parts, conclusion first? Capture it here once and every answer follows your style and structure from then on. Test it in a new chat and refine until it fits.
Organisation instruction. If you have the Owner role, you see an organization-wide instruction below it. It applies to every user in your organization. Two things to know:
- the instruction applies to the persona you are working in at that moment, which is why the field is called, for example, System instruction for LEO. Switch persona and you are editing a different instruction;
- the instruction comes on top of the persona’s standard instructions. Those always keep applying.
Leave the field empty and no extra organization instruction applies.
Persona
Section titled “Persona”If you have access to more than one persona, this is where you switch. Current persona shows which one is active.
Important:
- switching reloads the app;
- some screens exist only in one persona;
- dossier and chat lists belong to a persona, so after a switch you see a different list;
- LEO and LEO Fiscaal share the same dossiers and chats.
If you only have one persona, the screen tells you only one persona is enabled for your account.
Use this together with:
- The personas to see what sets each persona apart;
- Knowledge (sign-in required) to see which sources are available per persona;
- Projects to understand why the dossier list changes after a switch.
Language
Section titled “Language”You choose the app language here: Dutch or English. Click a language and the app switches right away.
Your language choice is stored on your profile. It therefore applies in all your personas and on every device you sign in on. Notifications and emails about your notifications also reach you in this language.
If saving fails, the app shows Language preference not saved and restores your previous language. Try again in that case.
Personal preferences for the chat. Note: these settings apply per device. If you set them on your laptop, they do not automatically apply on your phone or in another browser.
There are three settings.
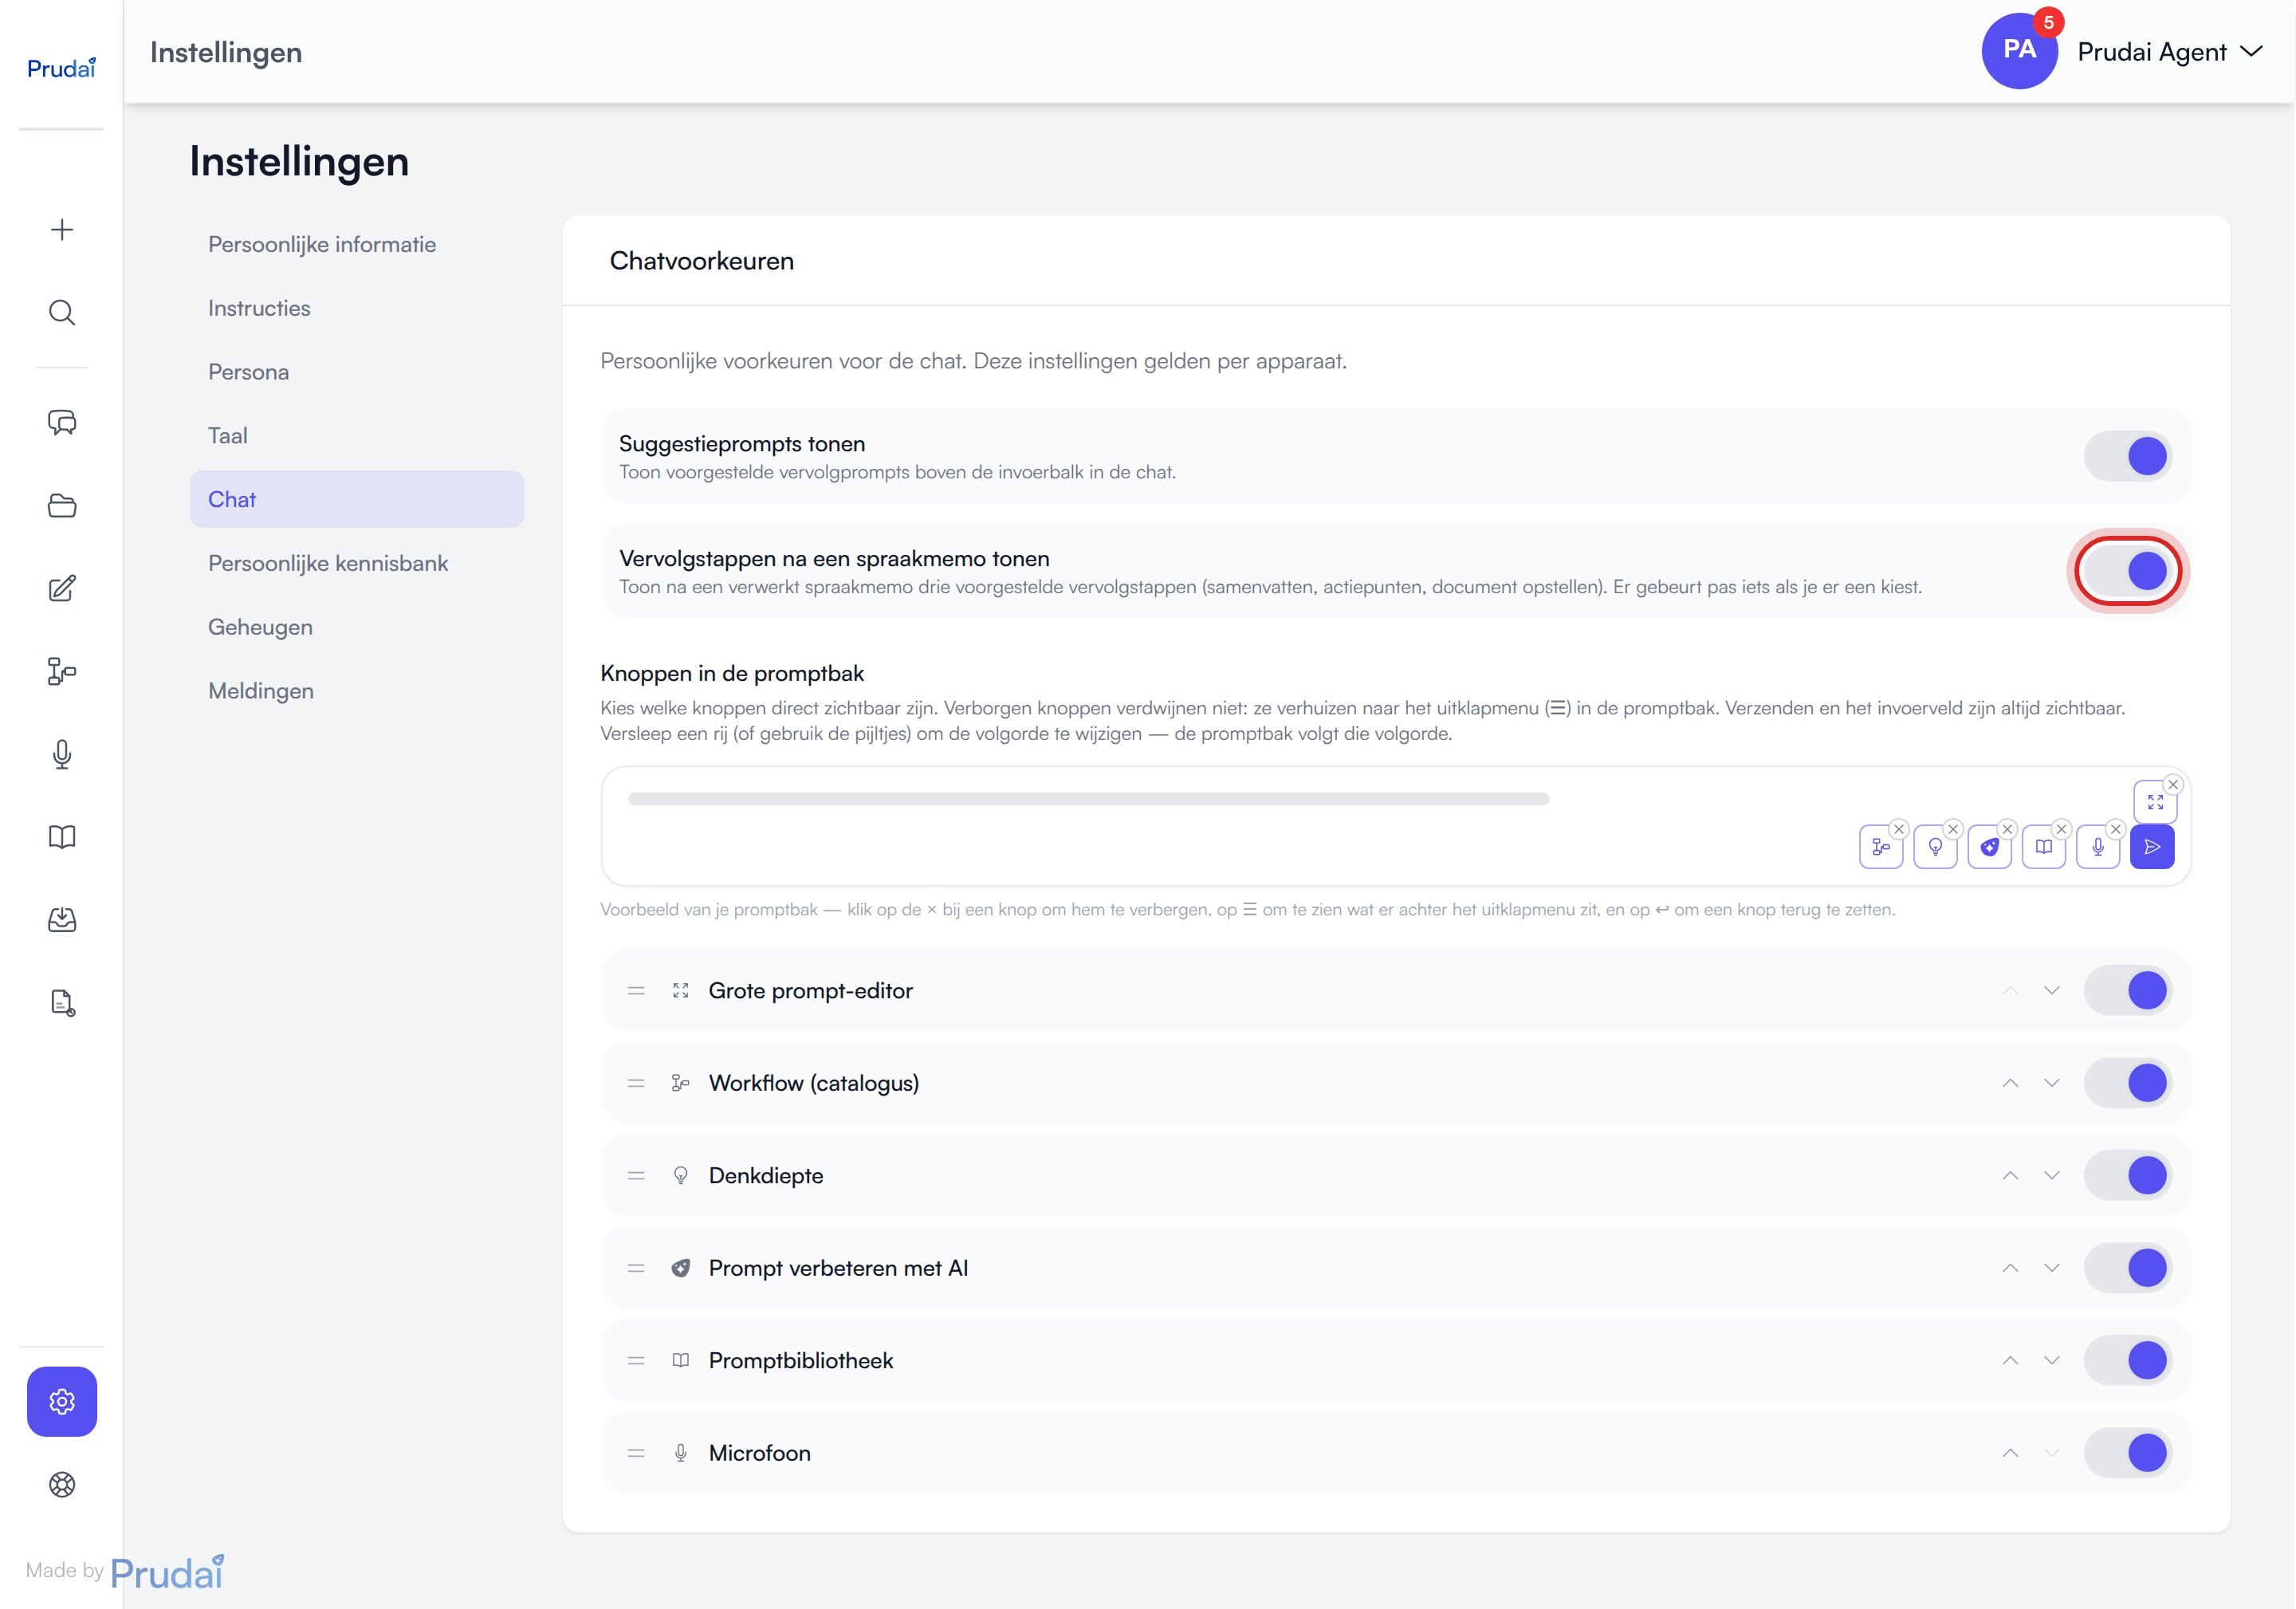
Show suggestion prompts. Determines whether suggested follow-up prompts appear above the chat input. If you switched suggestions off in the chat, this is where you turn them back on.
Show follow-up steps after a voice memo. After a voice memo has been processed, the card What would you like to do with this memo? appears with up to three next steps, such as Summarise, Extract action items, or Ask a follow-up. Nothing happens until you pick one. If you clicked Don’t show again on that card, this is where you turn the next steps back on. More about these follow-up steps: Projects.
Buttons in the prompt bar. Here you choose which buttons are shown directly in the prompt bar. What you hide is not gone: it moves to the expand menu (☰) in the prompt bar. Send and the input field are always visible.
- Drag a row (or use the arrows) to change the order; the prompt bar follows it.
- Above the list sits a live preview of your prompt bar: click the × on a button to hide it, ☰ to see what sits behind the expand menu, and ↩ to bring a button back.
- The buttons in the list are: Large prompt editor, Workflow (catalog), Thinking depth, Improve prompt with AI, Prompt library, Attachment (paperclip), and Microphone.
You only see the buttons you actually have at that moment:
- Workflow (catalog) only appears in LEO and LEO Fiscaal;
- Thinking depth is missing if your organization has hidden that choice;
- Microphone only appears if your browser can record;
- Attachment (paperclip) only appears on a narrow screen, such as a phone. On a larger screen you add files by dragging them into the conversation, or through the Attachments handle to the right of the chat with Add files. See Chat.
For what your organization can switch off, see Quick start.
Personal knowledge base
Section titled “Personal knowledge base”This is also your file library. It is where you upload and manage the files on your own account. The assistant can use these files in all your chats.
- In the user menu the entry is called My Files.
- An old link to the separate files page takes you here automatically.
If your organization has switched off uploads, you see Uploads are disabled by your organisation. Your existing files stay available: you can open, download, and delete them. See What your organization can switch off.
At the bottom sits the Reset Personal KB button. It is disruptive: it deletes your personal knowledge base, including the files in it. The assistant can no longer use what was there afterwards, not even in chats that are already open.
The app asks for confirmation first. Do not treat that as a routine click-through. Only reset when support or your administrator advises it, or when your personal knowledge base seems wrongly linked or corrupted.
More about file management: Files.
Memory
Section titled “Memory”This is where you manage what the assistant remembers about you between conversations, such as recurring preferences, frequent counterparties, or style rules.
What you can do:
- View: the list of stored memories, with a counter for the total and for core memory.
- Add: with Add memory you create a memory yourself, with title, content, kind, tier, persona, importance, and keywords.
- Edit and Delete a memory.
- Pin: pinned memories are always included in the context. Unpin removes that again.
- Search and filter: by text, by tier (Core memory or Archive), by kind, and by persona.
A memory belongs to one persona or applies to All personas. Memories that appear to contain privacy-sensitive data are blocked and not saved.
Tip: use memory for stable, personal context. Context about a single matter belongs in dossiers and documents.
Notifications
Section titled “Notifications”Here you set, per category, how a notification reaches you. Every category has two switches:
- In-app inbox: the notification appears in your notification overview in the app;
- Email: you also get the notification by email.
Your changes only take effect when you click Save preferences. They apply in all your personas.
You read the notifications themselves on the Notifications page. That page also lists the categories and their default settings.
What you will not find here
Section titled “What you will not find here”- Your specialization. The specialization stepper is not part of Settings. You walk through it the first time in the chat and manage it afterwards on Knowledge (sign-in required).
- Organization logo and branding. The owner of your organization sets those in the Account Dashboard. If your organization has its own logo, it appears at the top left of the sidebar, also when you collapse the sidebar.
- A light/dark or theme choice. That does not exist for users.